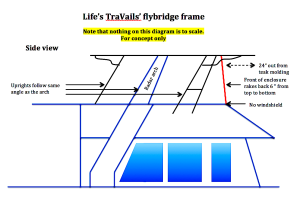
8/13-18/2015 Summary: For Tom, the process of having a custom-built flybridge enclosure and frame is not just an “Okay, do what you think is right” for the builder. He put a lot of thought into the frame and where it would attach to the boat, the materials and how the canvas would attach, and what the final product would look like. Would it meet our needs for now and the foreseeable future? So with his somewhat crude drawings, he flew to Stuart to meet with the frame builder and prep the boat for installation of the new frame.
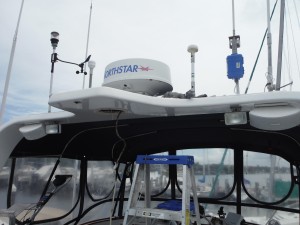
One of the biggest jobs was to clean up and re-bed (remove and reinstall with 3M 4200 caulking) everything on the radar arch, more of a job than he thought.
When it was all said and done, a week later, the design was finalized and the builder was ready to build the main sections of the frame and weld them together in place on the boat.
 And while he was there, Tom removed the dry-rotted anchor pulpit, which will be another big project.
This is where we start getting into more details of the daily activities, so you may chose to stop here.
8/13 Jeremy, the frame builder, arrived at the boat to review the plans [link to PDF of plans] before we went to his shop to see material options, sort of like going to the carpet store to pick out the right one. We agreed on the frame size (mostly 1 1/4” aluminum tubing) and how the canvas would be attached.
We then stopped by the Apex Marina to which we will be moving the boat so Jeremy can back his welding truck right up to the dock. It looked like it will be just fine, although a bit more exposed than Sunset Bay Marina and nowhere near as nice,
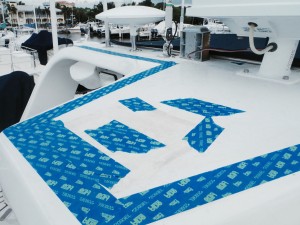 8/14 With a good idea of what we were doing, it was time to prep the radar arch for the new frame and canvas. After a trip to the boat supply store, the first job was to remove the old TV antenna, a 2 1/2 ‘ diameter dome mounted on the rear of the arch. Then came the task of re-bedding all the items mounted on the arch and removing old tracks and snaps from prior canvas installations. There were 6 antennas to re-bed, plus the radar receiver, and 92 holes to be filled!
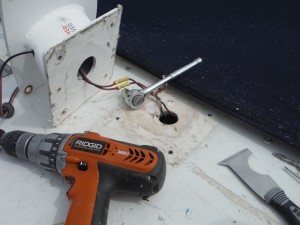 The radar was a bit of a task because whoever installed it originally took the easy way out by not running the wiring up through the mount like it should have been. About the time the radar was finished, rain descended and shut down the outside operation for the day. Moving inside, Tom worked on some of the minor items on the list, like the TV cable, and design for the anchor pulpit replacement.
8/15 Tom was up early to a bright sunny day and lots of holes to prep for filling. The majority were 1/8” holes from pop rivets and small screws, but there were several 1/2” holes and a couple over an inch. They all needed to be countersunk to give the filler something to adhere to, then the entire arch sanded in prep for repainting.
Tom was at a good stopping point with almost all the prep work done when Jim & Ann O’Malley arrived to pick up the Plexiglas from the windshield we removed for the new enclosure. Tom had put its availability up on the DeFever Forum as free to the first caller. And it was only right that Jim was the first, as he had sent us strainer parts when we were in need. We started talking about doing the Loop, and 2 hours later had some great ideas. We made plans to stop by their place when we head north, hopefully next month.
Once they left, it was back to the radar arch. But wait…15 minutes later, the rain started again! This time it sent Tom inside for the rest of the day to do more small projects (and take a short nap)!
8/16 Tom was up early again to work on filling all the holes and paint the top of the arch. The bigger holes had to be filled with plugs to keep the filler from just falling through, but just when it was time to start filling…more rain. But it was short-lived this time and 30 minutes later Tom started filling the holes, then sanded them smooth, filled in the ones which needed more, more sanding, and once more with filler on a few of them. Once they were all filled and sanded smooth, the arch got a coat of primer paint. That went well (other than Tom didn’t read the instructions correctly and it started to set up before he was finished, leaving a “not too smooth” surface).
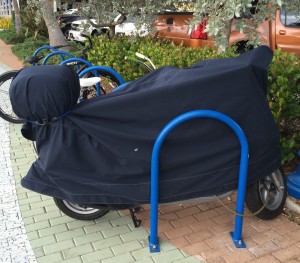 LC (Life’s Cycle, the scooter) was removed from the mother ship to allow the enclosure workers room to get around on the boat. So she was moved ashore and parked up by the bicycles, which she was not too happy about.
In a conversation about the anchor pulpit with Dave (on the boat next to ours), he suggested using a lam-beam. Interesting idea, and a call to the local Home Depot found that a custom-built beam made of yellow pine could be made for about $120 (way less than the other options we had considered, and yellow pine was one of the recommended material for the replacement)!
8/17 Jeremy arrived with a couple of sample frame pieces to use as patterns for the other pieces. He simply put it up where it belonged, made a few marks for the changes to be made and took it out to his truck with a bender mounted on front. A few pulls here and a few pushes there and in short time, he had the necessary curves. He made it look simple.
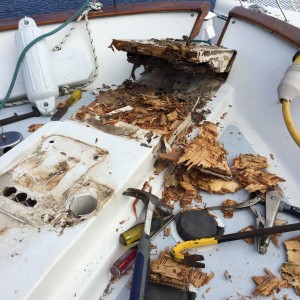
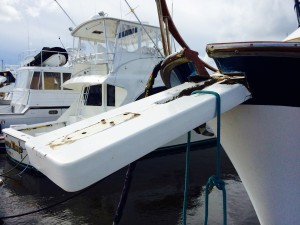
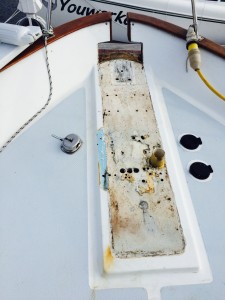
With that task finished, Tom attacked the anchor pulpit. Dave helped get the 2 anchors off the bow. Then it was crowbars, screwdriver, chisel, hammers, and a few wrenches, and out it came. Tom had to crawl into the anchor chain locker to unbolt the pulpit, taking his phone with him just in case he got stuck and needed to call for help. Don, the guy from down the dock, walked by at just the right time and helped with sliding the front piece out and onto the dock. A little cleanup revealed about 20 unused holes from previous winches and who knows what, but the fiberglass under the pulpit seems solid. There was one small section right at the bow where there seems to be some plywood damage, which we’ll probably replace with a piece of composite. A little aluminum tape covered the holes until Tom can return to craft and install the new pulpit.
8/18 Tom was up at 4:15 AM to head to the airport, but a quick look at the weather showed a tropical storm developing off the coast of Africa. Projections gave it an 80% chance of developing into a named storm, and some of the tracking models had it coming towards Florida. So Tom took some time to batten down the hatches and secure things on the aft deck, which made him late enough to miss his first option for a flight to Phoenix, but option B (or was it C?) got him home in time for dinner.
The plan is to return to the boat in about 10 days to help Jeremy install the enclosure frame, and work with Steve on the final plans for the canvas. Lord willing, both projects should be done by late September.


